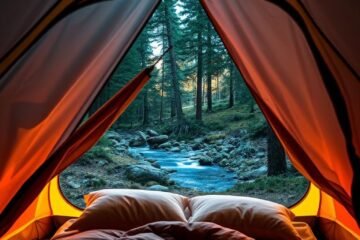
Camping overnight is one of the most rewarding ways to connect with nature, but it can also feel intimidating if it’s your first time. The fresh air, the starry skies, and the quiet moments by the campfire create memories you’ll carry for years—but only if you’re prepared. Without the right planning, small mistakes can quickly turn into big inconveniences. In this guide, you’ll discover practical tips that help you set up camp like a pro, stay safe in the wilderness, and sleep comfortably outdoors. Whether you’re heading to a local state park or a remote backcountry site, these steps will give you the confidence to enjoy every moment of your adventure. (Pro tip: Check your state’s camping regulations and learn basic Leave No Trace principles before you go.)
Camping Overnight Tips for a Smooth First Trip
Planning your first overnight camping trip? Start with a short, beginner-friendly route so you can focus on enjoying the experience instead of pushing your limits. Arrive early to set up camp while there’s daylight—you’ll have time to pitch your tent, test your gear, and explore your surroundings. Pack layers for changing temperatures, and always keep rain protection handy. Store food securely to avoid attracting wildlife, and carry more water than you think you’ll need (or bring a reliable water filter). Use a headlamp instead of a flashlight to keep your hands free, and pack a small first-aid kit for unexpected scrapes. Before sleeping, double-check that your campsite is tidy and all essentials are within reach. A little preparation goes a long way toward making your first night under the stars comfortable, safe, and memorable.
Table of Contents
These first three paragraphs are tuned for search and skimmability: if you’re new to overnights, you’ll learn the core systems (shelter, sleep, kitchen, water, navigation), and if you’re returning to backpacking after a break, you’ll find modern best practices for ultralight packing, food storage in bear country, and campsite selection that matches Leave No Trace. Links throughout point to related deep dives on Hiking & Trail Guides, beginner gear, and mindful time in nature.
Bottom line: clarity reduces pack weight. When every item has a job and every action has a sequence, you waste less energy—and enjoy your trip more. This guide prioritizes what to do, when to do it, and why it matters, with six embedded visual aids you can reference from your phone, even offline.

Pick the Right Route
Right route, right trip. Start with travel time, daylight hours, group experience, and water availability. For first overnights, aim for 4–8 trail miles per day with moderate gain and multiple campsites along the way. If you’re unsure about conditions, choose a destination where you can bail to the trailhead by lunch on day two.
Look for loops and out‑and‑backs with established camps. Check for reliable water near camp (but avoid camping directly next to water—many land managers ask for 200 feet of buffer). A route with mid‑way water reduces how much you must carry, which reduces fatigue and injury risk.
Cross‑reference recent trip reports and official land‑manager notices for closures, fires, or trail work. If your party includes someone new, pick a route that would still be a fun day hike in case you decide to shorten the plan.

Permits, Access & Seasonal Timing
Permits protect high‑use areas. Some parks use quotas or timed entry—respect them and you’ll enjoy quieter camps and healthier trails. Put permit windows on your calendar months ahead for popular destinations.
Seasons matter: shoulder months bring cooler nights, fewer bugs, and fewer crowds. Snowmelt may flood creeks; late summer can bring fire restrictions. In deserts, plan for heat management and carry capacity; in alpine zones, plan for sudden cold snaps even in August.
- Check access gates and road conditions to trailheads.
- Review fire restrictions: stoves vs. fires, spark arrestors.
- Understand bear canister rules and food storage requirements.
- Confirm group size limits and campsite quotas.
Overnight Gear That Works
You don’t need the lightest kit—just a kit that works together. Balance comfort, durability, and cost. If you’re starting from a solid day‑hiking setup, add shelter, sleep, and kitchen systems, then refine across trips.
Shelter
- Two‑wall tents are forgiving and reduce condensation.
- Freestanding designs pitch fast on rock or sand.
- Ultralight shelters work best with practice and site selection.
Sleep
- Quilt or sleeping bag rated for your coldest expected night (add a liner for +5–10°F).
- Insulated pad with R‑value appropriate to season; pair pads in shoulder seasons.
- Sleep clothes stay dedicated to sleeping—dry, warm, and clean.
Kitchen
- Canister stove for speed and simplicity; alcohol or solid‑fuel for ultralight.
- Windscreen usage improves boil times and fuel efficiency (mind safety).
- Dedicated cold‑soak jar if going stoveless.
Water
- Filter + chemical backup (tablets or drops).
- Hard bottle + soft flask combo for flexibility.
- Know where you’ll refill; carry extra in dry stretches.
Clothing & Footwear
- Avoid cotton; use synthetic or wool layers.
- Bring a puffy even in summer at altitude; nights bite.
- Trail runners are fine for many trips; mid‑boots help with load and terrain.
Navigation & Safety
- Paper map + compass always; phone GPS with offline maps.
- Headlamp with fresh batteries + spare.
- Small first aid kit tailored for blisters, scrapes, and stomach issues.
For beginner gear picks, see Hiking Gear for Beginners, and for day‑hike planning fundamentals, check the Hiking & Trail Guides hub.

How to Pack for Balance & Comfort
Pack so it carries itself. Heavy items sit close to the spine and mid‑back; soft items fill dead space and pad hard edges. Keep rain gear, water, and snacks near the top or in external pockets. A tidy pack is safer and faster to live out of.
- Bottom: sleep system in a dry sack.
- Middle (closest to back): food, stove, fuel—the dense stuff.
- Top: layers, rain shell, first aid, headlamp.
- Outside: water, map, small trash bag, bathroom kit.
Use color‑coded stuff sacks or see‑through pouches so you can spot items quickly in the dark. In rainy regions, line the whole pack with a contractor bag as a fail‑safe.
Shelter Setup—Wind, Water & Wear
Pitch with purpose: nose into—or just off—the wind; keep your door away from prevailing gusts to reduce spindrift and spray. Scan for widow‑makers (dead branches) and rolling hazards. Imagine a midnight storm: where will water flow? Your tent should not be the answer.
Stake corners first, then raise poles, then tension fly. In sand, use deadman anchors. On slick rock, use cord to extend stakes or anchor to rocks—pad the cord to avoid abrasion.
In rain, pitch the fly first if your design allows. Ventilate: a small gap reduces condensation, which keeps your bag lofted and warm.

Camp Kitchen: Safe & Efficient
Keep the kitchen 200 feet away from your tent and water sources. Split tasks into zones—prep, cook, clean—and keep a handwashing station or sanitizer bottle in the middle. This reduces cross‑contamination and speeds cleanup.
- Prep: set a stable surface; control knives and fuel.
- Cook: windscreen in place, stable burner, no loose clothing.
- Clean: strain food bits; pack them out; scatter strained water widely where allowed.
- Store: bear‑safe container or hang per local regs.
Plan meals with an eye to fuel and cleanup. One‑pot dinners and freezer‑bag cooking minimize dish chaos. Always pack an emergency extra dinner.
Water Treatment & Carry Strategy
No system is perfect; redundancy matters. Pair a squeeze filter with chemical backup. If freezing conditions threaten, sleep with your filter in a bag inside your quilt. In hot conditions, adopt a camel‑up routine: drink 300–500 ml at sources, then top bottles.
- Mark water sources on your map with approx. flow confidence.
- Carry capacity for your longest dry stretch—don’t gamble.
- Consider electrolytes for hot days and heavy climbs.

Wildlife Safety & Food Storage
Wildlife learns quickly where humans are messy. Your job is to be boring: no smells in your sleep system, no crumbs in your pockets, no food in your tent—ever. In bear country, use approved canisters or lockers; elsewhere, follow local rules for hangs or canisters.
- Cook and eat away from your camp; never in the tent.
- Odor‑proof bags help, but are not a bear canister.
- Never approach wildlife for photos; zoom with your feet is not a thing.
- Teach kids food rules as a game: clean camp earns dessert.
Sleep System Tuning (Warmth Without Weight)
Warmth is more about draft control and pad R‑value than a few ounces of insulation. If you sleep cold, upgrade your pad first, then your bag/quilt. Wear a dry beanie and socks to bed; vent the quilt before you sweat.
- Understand comfort vs. limit ratings—comfort is realistic for most.
- Keep a small snack and water handy for 2 a.m. metabolism dips.
- Dry camp? Pre‑boil water, bottle it, and use as a foot warmer in the bag.
Leave No Trace at Night
Night magnifies mistakes. Headlamps find shortcuts around rules; don’t let them. Stick to durable surfaces and existing sites, keep noise low, and protect dark skies by shielding lights. In the morning, walk your site: if someone else can’t tell you were there, you did it right.
- Camp at least 200 feet from water.
- Use established sites where allowed; avoid trampling vegetation.
- Pack out micro‑trash: corners of wrappers, twist ties, coffee drips.
- Leave what you find—no carving, no rock stacks.

Troubleshooting: Weather, Gear, and Group Dynamics
Things go sideways—plan for it. A kit you know beats a fancy one you don’t. Treat mistakes as data, not drama, and capture notes for post‑trip tweaks.
Weather Swings
- Wind: lower tent profile, reinforce stakes with rocks.
- Downpour: dig micro‑channels only where permitted; better yet, pitch on high, durable ground.
- Cold snap: layer your sleeping pad system; use a warm hat; insulate from ground while cooking.
Gear Failures
- Broken pole: splint with a sleeve and tape; re‑pitch low.
- Clogged filter: backflush or switch to chemical backup.
- Busted zipper: safety pin the slider for the night; repair at home.
Group Mismatch
- Set expectations before you go: pace, wake time, bedtime.
- Practice ‘no‑blame bailouts’—shorten the route if safety or morale dips.
- Use radios or strict rendezvous points if you split up.
Printable Checklists
Save these to your phone or print them. Tweak for your region and season.
Overnight Essentials
- Shelter: tent, stakes, guylines, footprint
- Sleep: bag/quilt, pad(s), liner, pillow
- Kitchen: stove, fuel, pot, lighter/matches, spoon
- Water: bottles, filter, chemical backup
- Clothing: base, mid, puffy, shell, spare socks
- Safety: map, compass, headlamp + spare, first aid
- Food: dinners, breakfasts, snacks, electrolytes
- Misc: trowel/kit, trash bag, repair tape, cord
Camp Setup Flow
- Pick site with wind & water in mind
- Pitch shelter; stake corners; add fly; tension
- Stage kitchen 200 ft away; bear storage plan
- Collect/treat water; set handwash station
- Prep dinner; eat; clean; store food properly
- Night scan: guyline tension, weather, critter checks
Related Guides & Next Steps
- Hiking & Trail Guides (Pillar)
- Best Hikes by Region
- Hiking Gear for Beginners
- Outdoor Activities for Mental Health
- Forest Bathing Benefits
Want this in your pack? Save the page as a PDF or screenshot the visuals. If you’re training for multi‑day routes, revisit this guide after each trip and adjust your system based on what you actually used.


0 Comments